Transactions Page
- Transactions include deposits and withdrawals. On the transactions page, you may add, edit, delete, and display transactions.
- Transactions may also be filtered and rebucketed.
- Transactions may be imported or exported from/to a csv file.
Transactions Page: Input deposits and withdrawals
- To input a deposit (transaction with a positive amount), click on the ‘+’ icon in the upper right corner.
- To input a withdrawal (transaction with a negative amount), click on the ‘-’ icon in the upper right corner.
- After filling out the deposit or withdrawal form, click SAVE. Next, you will see your newly entered transaction on the page.
Transactions Page: Filtering
- To filter transactions in the list, click on the filter icon in the upper left hand corner.
- After filling out the filter criteria form, click FILTER. Next, you will only see the transactions that meet the filter criteria in your transaction list.
Transactions Page: Rebucketing
- Rebucketing recalculates distribution transactions. If a bucket percentage has been updated since a distribution amount was calculated, rebucketing will recalculate the amount of all affected distribution transactions.
- After clicking REBUCKET and entering a ‘before date’ and/or an ‘end date’, Revenue Rabbit will only rebucket distribution transactions dated during the timeframe entered. If no dates are entered, all transactions will be rebucketed.
- For example, if you enter a transaction for $100 on June 15, 2020, when a bucket named ‘Profit’ with a percentage of 50% exists, Revenue Rabbit creates a $50 Profit distribution transaction dated June 15, 2020. Then, today you update the Profit bucket percentage to 25% and perform a rebucket setting the begin date to June 1, 2020, and the end date to June 31, 2020. During the rebucket, Revenue Rabbit will change the original Profit distribution transaction amount from $50 to $25.
Transactions Page: Export/Import to CSV file
- NOTE: If you plan to import tags and buckets, import those before transactions.
- To check out import/export, add some transactions.
- Click the ‘export’ button in the lower right hand corner of the screen.
- Type in your preferred output filename.
- Click EXPORT.
- Most browsers save your exported file to a Downloads folder in your user folder/directory on your computer.
- Next, click the IMPORT button in the lower right hand corner of the screen.
- Select the file you just exported keeping the checkbox, ‘overwrite existing transactions’ checked. If you uncheck this box and import, you will get errors since you have imported duplicate data.
- Using the same csv file format you exported, you may import a new file of new transactions. Be sure to uncheck the ‘overwrite existing transactions’ if you want to keep the existing transactions.
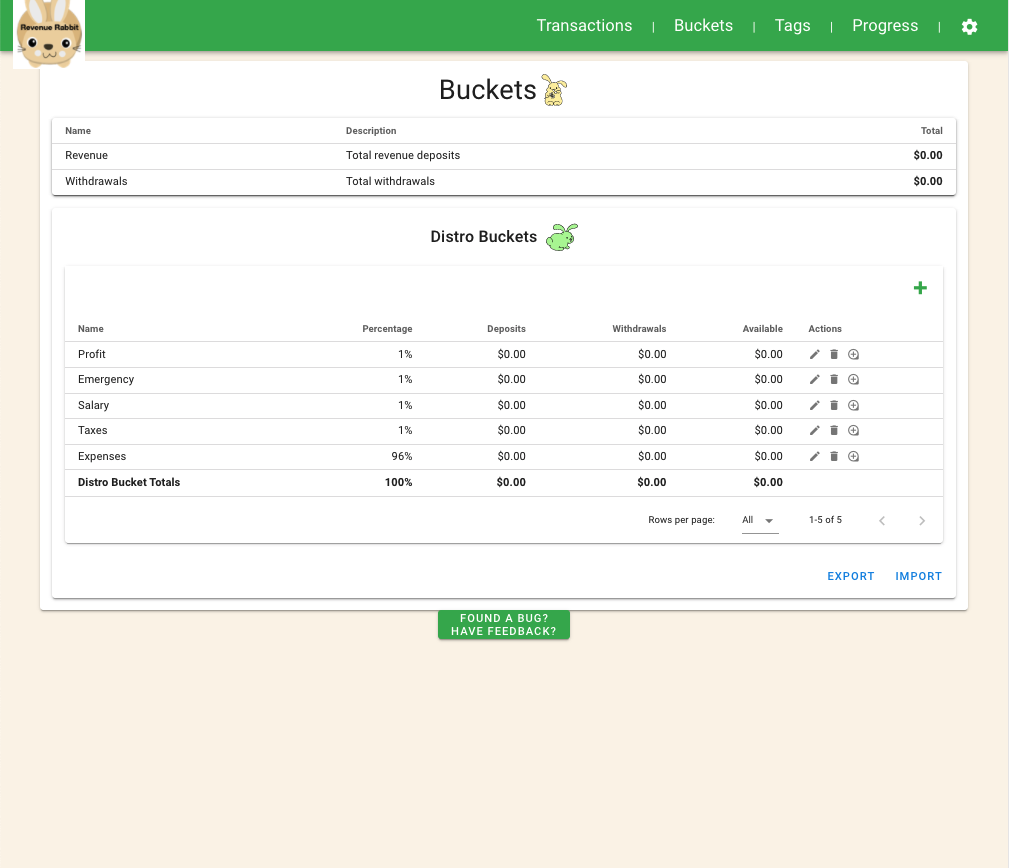
Buckets Page
- The Bucket page has two sections. The top section summarizes your total revenue and withdrawals. The bottom section summarizes your custom buckets, called “Distro” buckets by default. To change the name, check out the section, ‘Tags Page - Update Distro Tag.
- Your Distro Buckets are your spending priorities. Each Distro Bucket has a percent allocation. The percent allocation is used to determine the amount added to your bucket whenever a future revenue deposit is entered. You may add, edit, delete, and display Distro Buckets.
- See the ‘Transactions Page - Filtering and Rebucketing’ section to understand moving transactions between buckets.
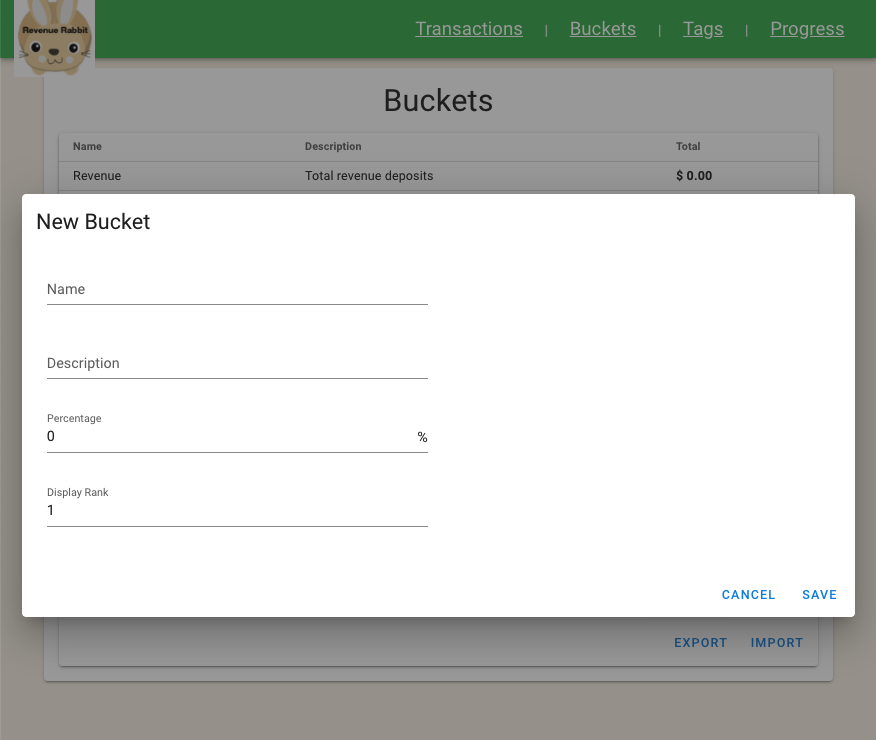
Buckets Page: Adding/Editing Buckets
- To add a bucket, click on the ‘+’ icon in the upper right corner.
- Fill out the ‘New Bucket’ form by adding a name and description. The percentage is used to determine the amount from each transaction that will be saved in the new bucket. Keep in mind the sum of all bucket transactions must equal 100%. Display rank is used to determine the order that the bucket will be displayed in the list. Smaller display ranks get displayed higher than larger display ranks on the bucket list page. After filling out the ‘New Bucket’ form, click SAVE.
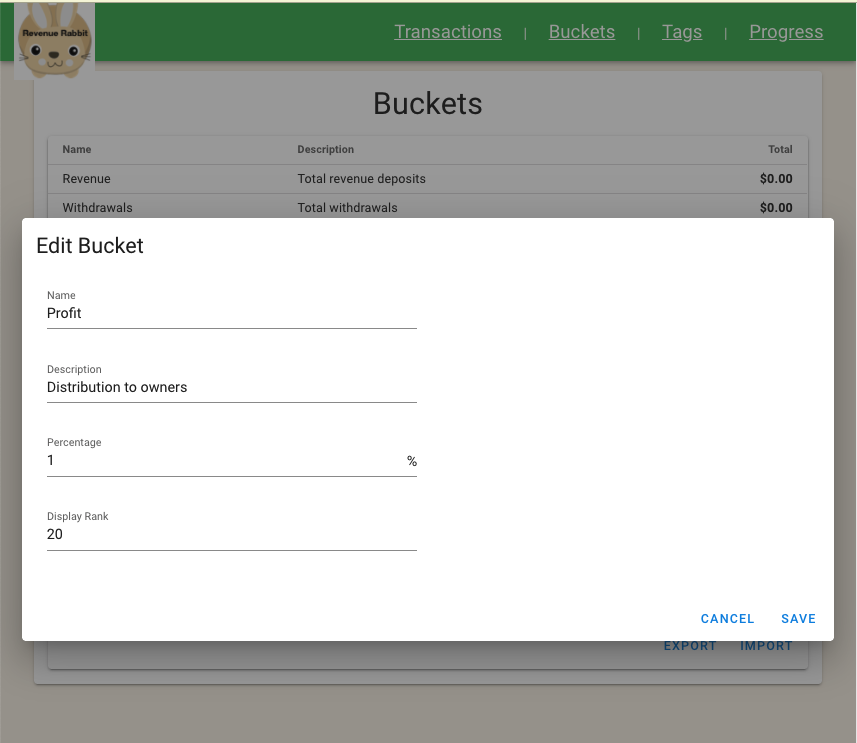
- To edit a bucket, click on the pencil icon in the row of the bucket you wish to edit.
- After filling out the Edit Bucket form, click SAVE. Next, you will see your newly edited bucket in the bucket list.
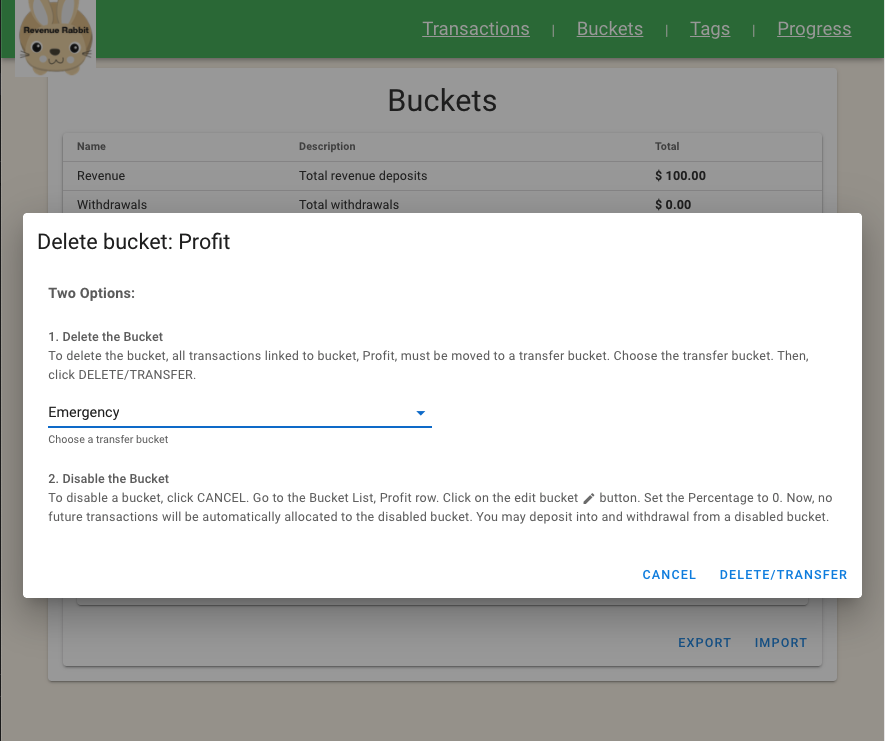
Buckets Page: Deleting/Disabling Buckets
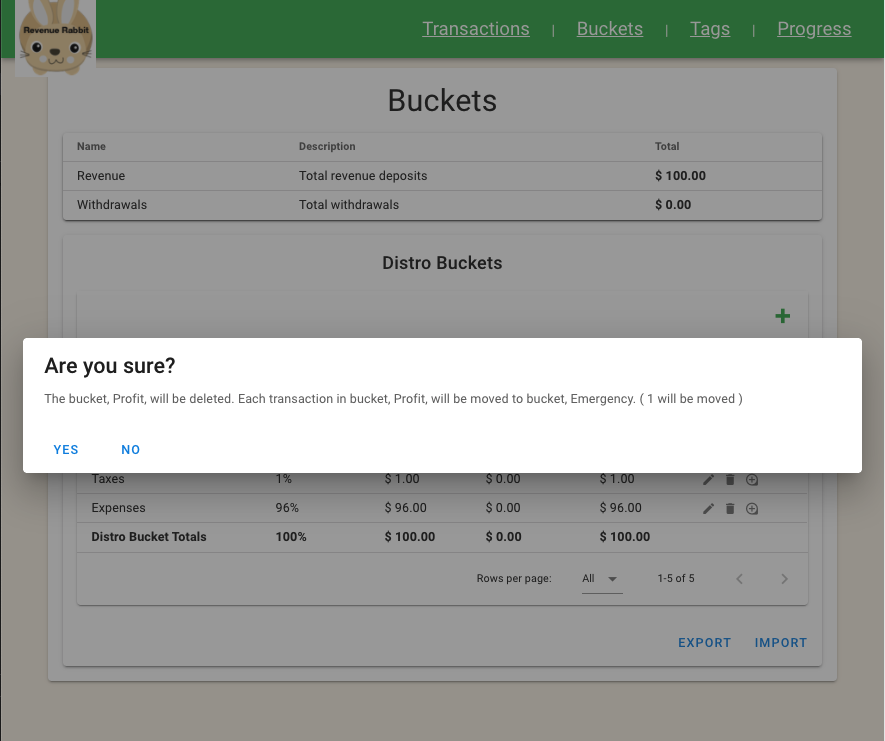
- For bucket delete, two options are available. You may transfer all transactions in the deleted bucket to another bucket or you may disable that bucket so no further revenue transaction amounts are added to the bucket.
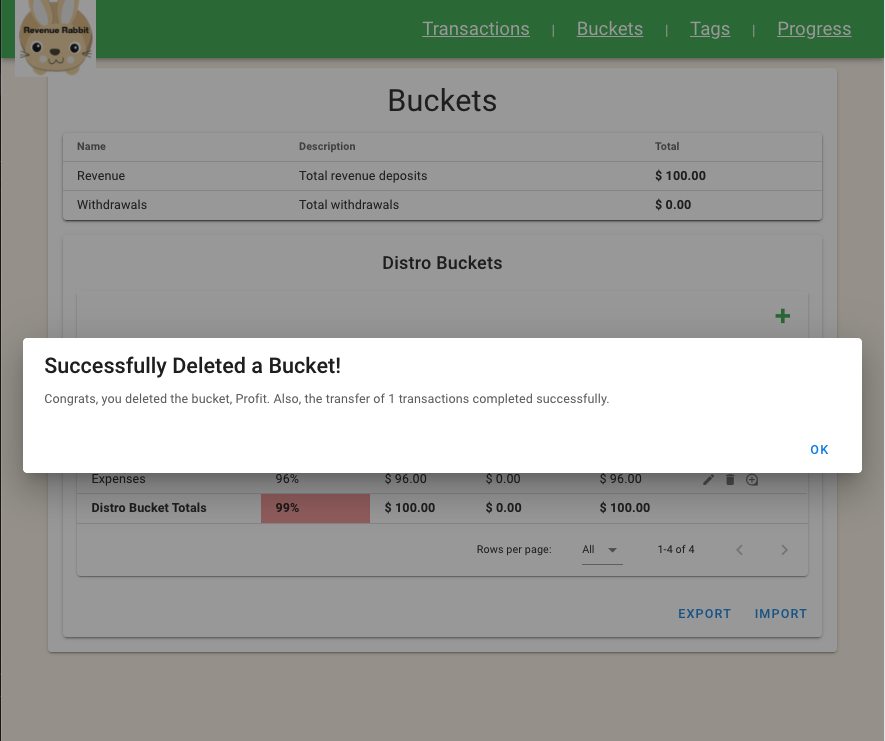
- For delete and transfer, click ‘DELETE/TRANSFER. A modal appears with the number of transactions to be moved. Delete and transfer requires a confirmation. Finally, a success message is displayed.
- To disable a bucket, click CANCEL. Go to the Bucket List row that you wish to disable. Click on the edit bucket button. Set the Percentage to 0. Now, no future transactions will be automatically allocated to the disabled bucket. You may deposit into and withdraw from a disabled bucket.
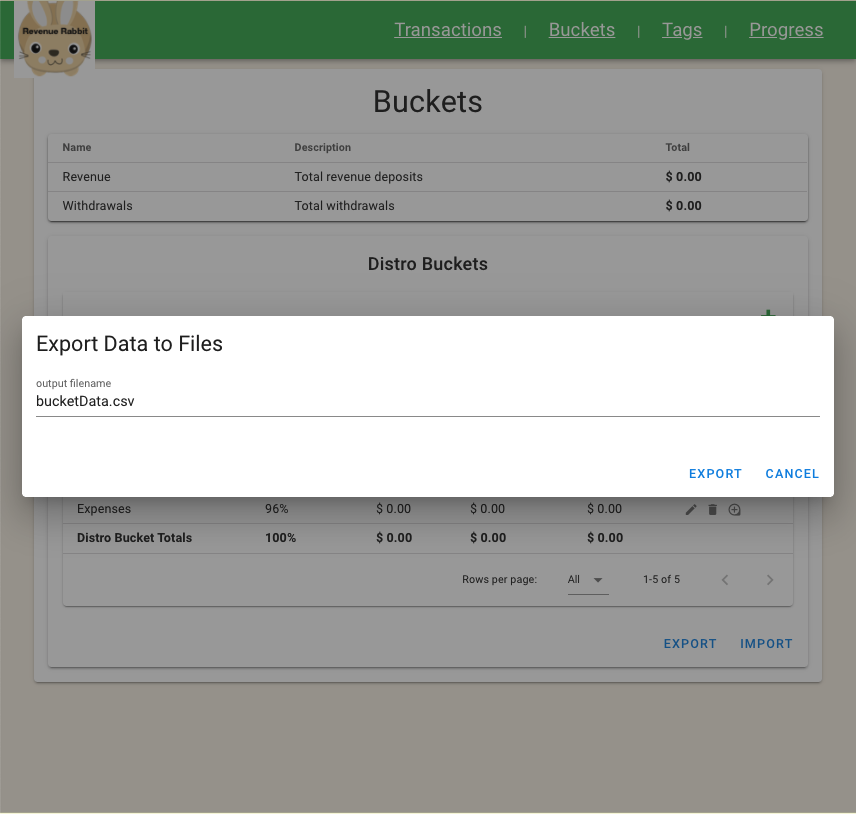
Buckets Page: Import/Export ‘Distro’ Buckets
- Click the ‘export’ button in the lower right hand corner of the screen.
- Type in your preferred output filename.
- Click EXPORT.
- Most browsers save your exported file to a Downloads folder in your user folder/directory on your computer.
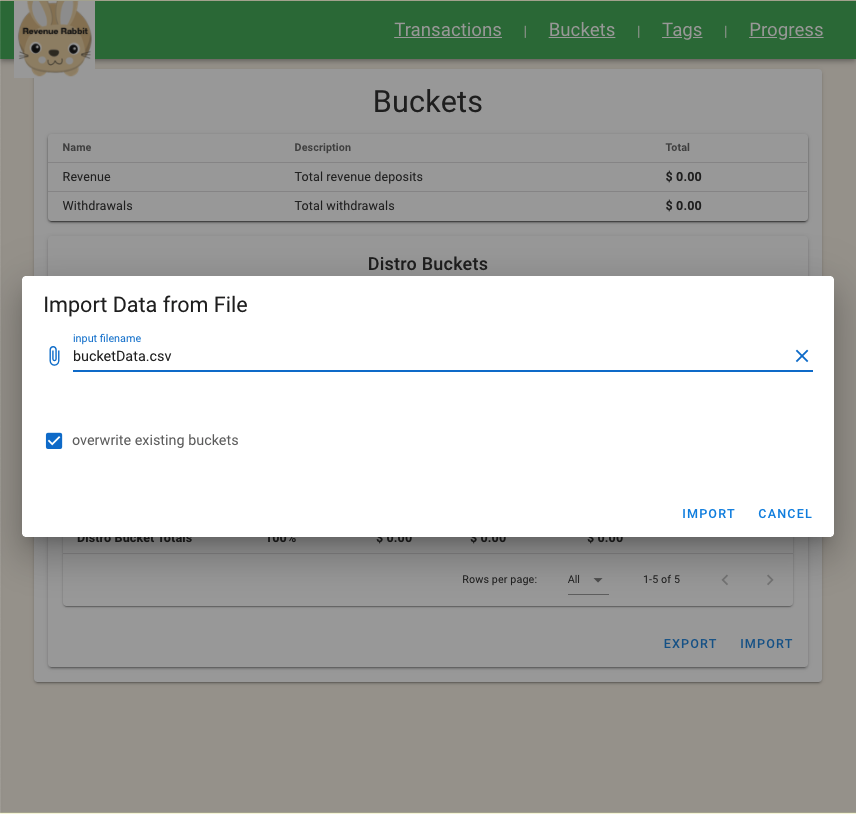
- Next, click the IMPORT button in the lower right hand corner of the screen.
- Select the file you just exported keeping the checkbox, ‘overwrite existing buckets checked. If you uncheck this box and import, you will get errors since you have imported duplicate data.
- Using the same csv file format you exported, you may import a new file of new buckets. Be sure to uncheck the ‘overwrite existing buckets’ if you want to keep the existing buckets.
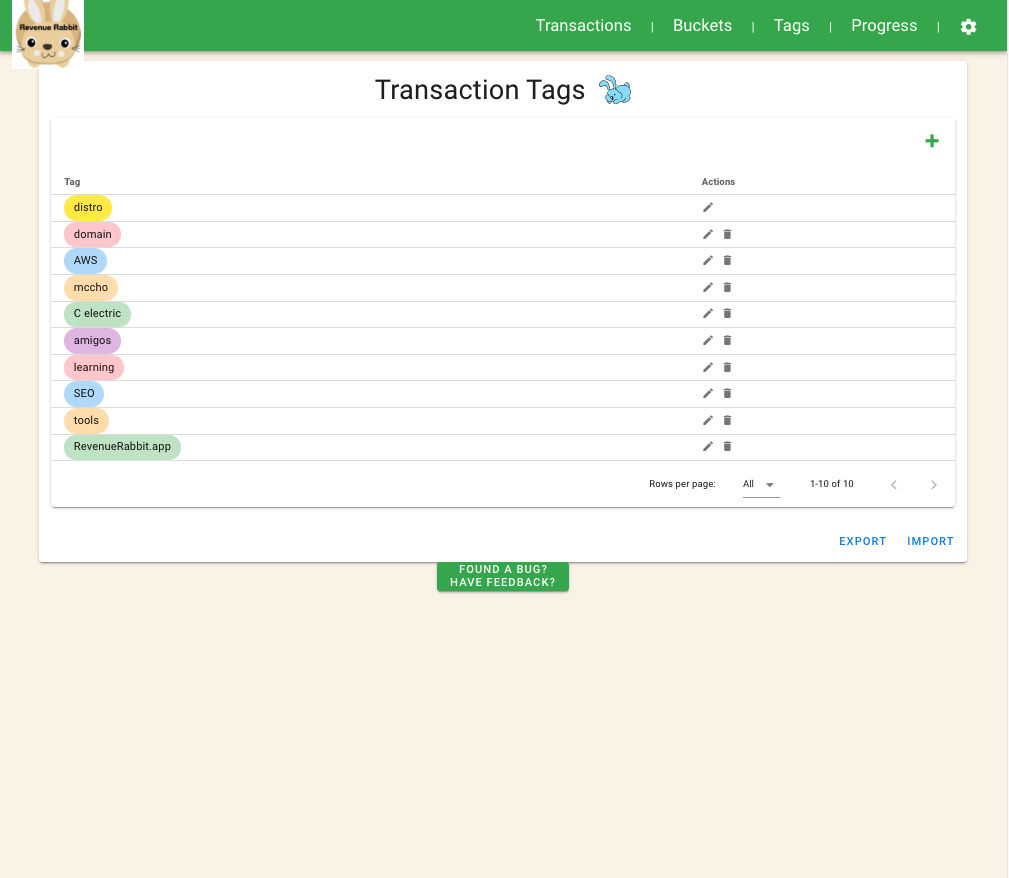
Tags Page
- Tags are used to organize transactions. The tags page allows adding, editing, deleting tags.
- Tags may be imported to or exported from a csv file.
- Transactions may also be filtered by tag.
Tags Page: Adding/Editing/Deleting Tags
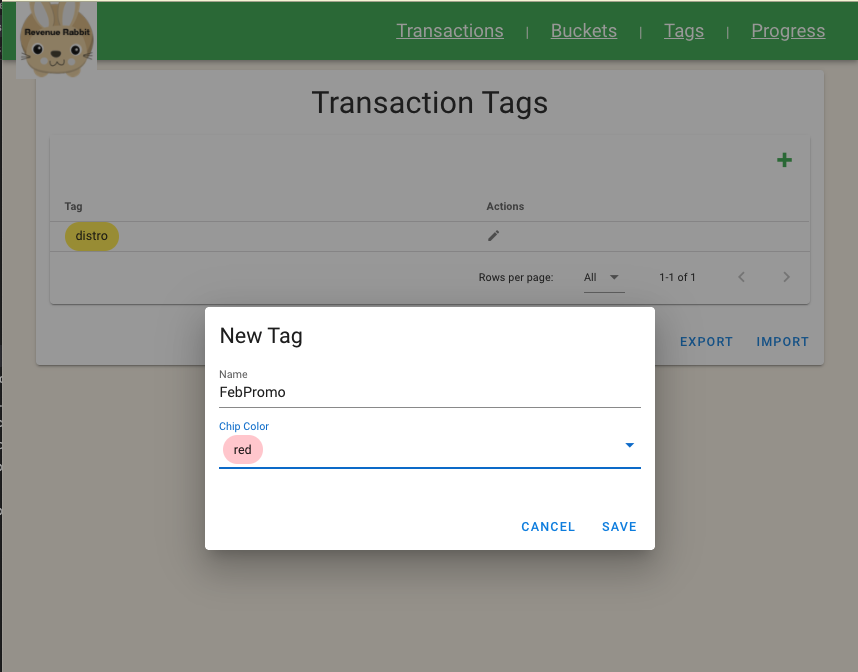
- To add a tag, click on the ‘+’ icon in the upper right corner.
- After filling out the New Tag form, click SAVE. Next, you will see your newly entered tag in the tag list.
- To edit a tag, click on the pencil icon in the row of the tag you wish to edit.
- After filling out the Edit Tag form, click SAVE. Next, you will see your newly edited tag in the tag list.
- To delete a tag, click on the basket icon in the row of the tag you wish to delete.

Tags Page: Import/Export Tags
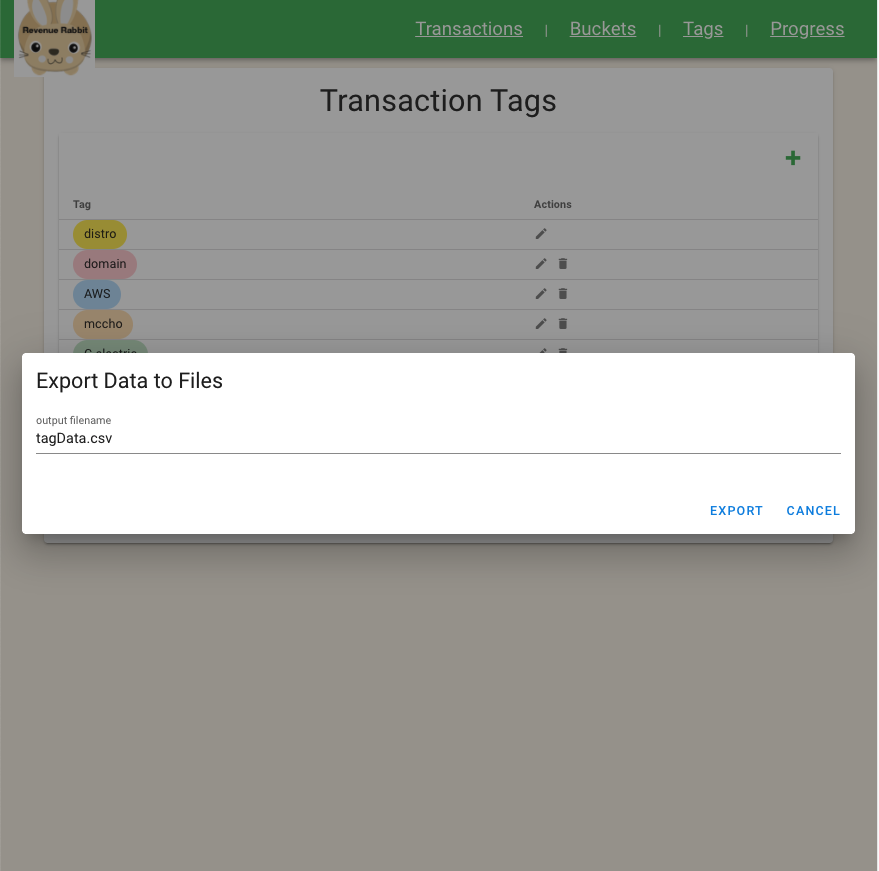
- Click the ‘export’ button in the lower right hand corner of the screen.
- Type in your preferred output filename.
- Click EXPORT.
- Most browsers save your exported file to a Downloads folder in your user folder/directory on your computer.
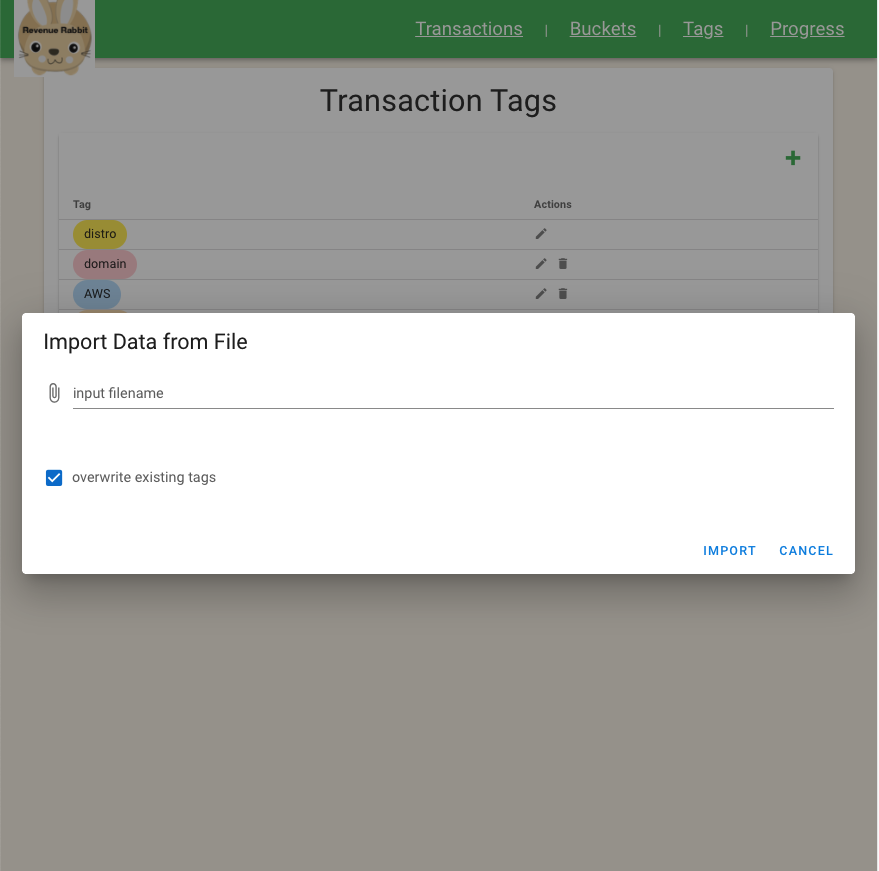
- Next, click the IMPORT button in the lower right hand corner of the screen.
- Select the file you just exported keeping the checkbox, ‘overwrite existing tags’ checked. If you uncheck this box and import, you will get errors since you have imported duplicate data.
- Using the same csv file format you exported, you may import a new file of new tags. Be sure to uncheck the ‘overwrite existing tags’ if you want to keep the existing tags.
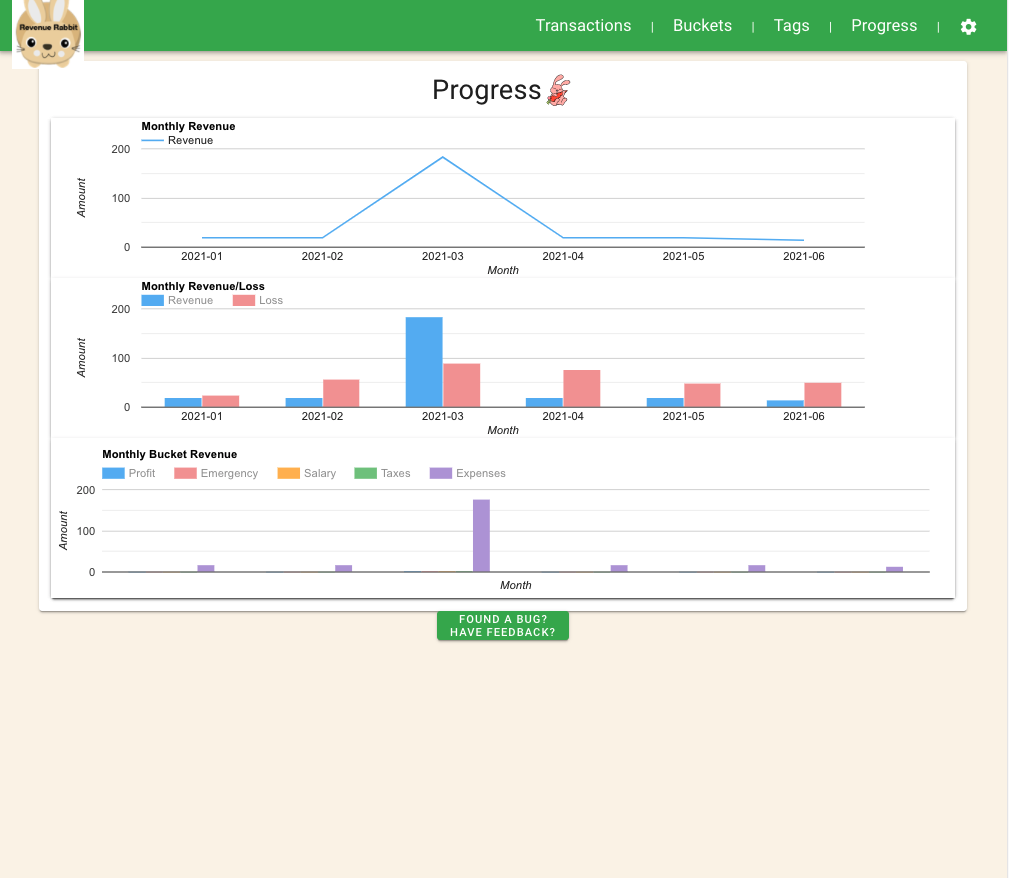
Progress Page
- View your monthly revenue progress on a line graph.
- View your monthly bucket revenue allocation progress on a column chart.
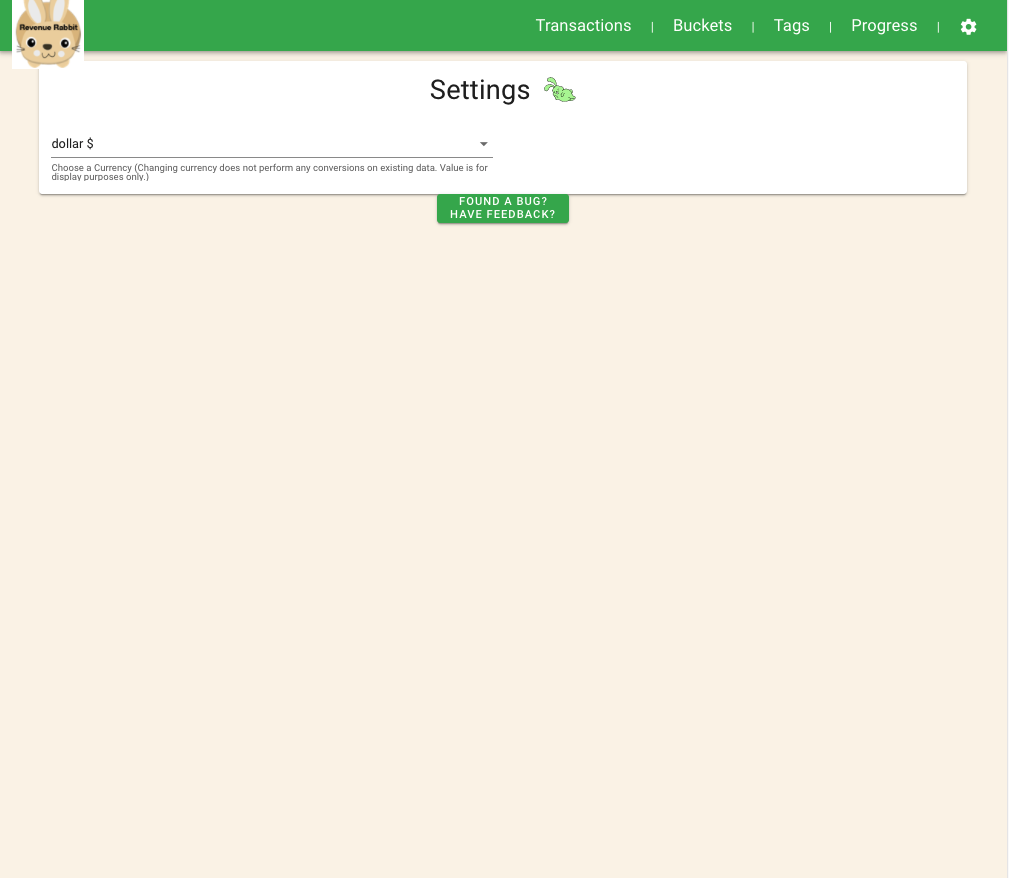
Settings Page: Changing the Currency Display
- To change how currencies are displayed, click the gear icon in the upper right corner.
- Select a currency. Currency selection is for display purposes only. No currency conversions will be made.

Ready to get started?
Free version requires no credit card. We only ask for your ideas and feedback.
Get Started